Using the Contacts List
All of your contacts are listed under Contacts in the right column. You can sort your contacts by either last name or first name by selecting the Sort By option at the bottom of the list; if no last/first name exists, contacts are sorted by company name.
You can hide the contact list to increase the size of the screen working area by clicking the blue button with the arrow above the list. Click the button again to re-display the list.
Finding a contact
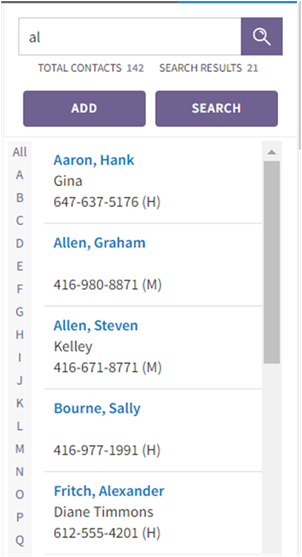
To search for a contact, either click a letter down the side, or enter one or more characters in the search field and press Enter or click the magnifying glass icon.
If you click a letter down the side, the list is filtered to show only contacts where the first or last name starts with the letter, depending on your selected sort option. If no name is entered for a contact, the list is filtered to show only contacts where the company name starts with the letter.
If the search field is used, the list is filtered to show all contacts that contain the character(s) in their main contact or spouse/partner first or last name, home address fields, or company name. You can also search by email address or phone number. The example below shows the contacts that contain dar.

To show all contacts again, click All.
Viewing a summary of a contact’s information
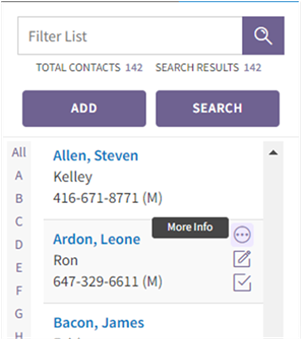
The contact list shows the contact name, spouse/partner name and first phone number, for quick reference. If you want to see additional information (other phone numbers, email address(es), home address) without opening the contact record, hover over the contact in the list, and click the More Info icon. (Click the icon again to hide the additional information.)

Entering a note
To quickly enter a note for a contact, simply click the contact’s Quick Note icon, enter the note details in the pop-up window and click Save to record the note to the contact’s Contact History. Upon saving, you are returned to what you were doing before without losing any work or valuable time.
Entering a task
To quickly enter a task for a contact, click the contact’s Quick Task icon, enter the details of the task in the pop-up window, and click Save. Upon saving, you are returned to what you were doing before without losing any work.
|
|
The Quick Task pop-up includes an Assign To drop-down list for the selection of the team member to which the task is to be assigned. The list includes all team members who are sharing their task list. |
Opening a contact record
To open the contact record, click the contact’s name link. The full contact record (Contact Profile and other tabs) opens in the work area to the left.


