Welcome to the Help area. You can get help with IXACT Contact in a number of ways:
|
|
|
|
|
|
|
|
Welcome to the Help area. You can get help with IXACT Contact in a number of ways:
|
|
|
|
|
|
|
|
Note: Contacts can be added manually (as described below), imported from other programs, captured from your website, or synchronized with your mobile device.
To add a contact:
1. Click Add in the left column. A blank Contact Profile opens in the work area.
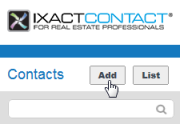
Note: You will see several tabs for the contact record; however, you cannot enter additional information until the contact profile tab information is entered and saved.
2. On the Contact Profile tab, enter the first or last name of the main contact, or the company name. You must enter at least one of these fields in order to create a contact record. This is how the contact is identified in all lists and reports.
3. Click Save. The contact is added to the Contacts list in the left column.
|
While you are only required to enter the first, last, or company name to save a contact record, you should capture as much information as possible in order to realize the full potential of IXACT Contact. Some fields are required for other functions of the program to work (e.g. to create letters or send mass emails), while other fields help you to categorize your contacts (e.g. to search for all contacts in a particular group, or to create a report of all FSBO prospect types). The fields are self-evident so they will not be described in detail here, but the following section identifies relationships between fields, or explains where a field is used in other areas of IXACT Contact, or offers suggestions for how you might later use the information. |
|
Many lists can be customized; see Modifying Lists. Remember that you can hide sections if you want; see How the Screen is Arranged. |
Section |
You need to know: |
Personal Mailing Set-up |
· The Letter Salutation field is used in letters and email messages. It defaults to the main contact and spouse/partner first name, but you can change it, for example to a more formal salutation ([Dear] Ms Jordan). · The Envelope Salutation is used as the first line anywhere the contact's address is used (e.g. letters, labels). It defaults to the main contact and spouse/partner title, first name, and last name, but you can change it if necessary. · If no first name is entered for the contact, the salutation fields default to the title (if entered) and last name. If the contact was created with a company name only, the salutation fields remain blank and you can complete them as you wish. Note: The salutation defaults only apply upon first entry; later changes to the name are not automatically reflected in the salutations. However, if you later change the name, when you save the record you are asked if you want to also change the salutations. |
Work Details |
· The information entered in this section is copied to the Business Directory tab. (The contact appears in the Business Directory only if the Include in Business Directory check box is selected.) · If you want this contact to be searchable by Business Type in the Business Directory, select the appropriate Business Type. Remember that you can modify the list if necessary. |
Phone/Fax/Email |
· Use the drop-down lists to identify each phone number or to change the order of the phone numbers. · If you enter multiple email addresses, select the one(s) that you want to send mass email messages to. · If applicable, select the contact’s Preferred Method of Correspondence · If a contact does not wish to receive mass emails, set Accepts Mass Emails to "No". By default, the contact cannot be selected to receive mass emails even if one or more email addresses are entered and Send Mass Email is checked. Note: After entering an email address and saving the contact, the applicable field label turns into a clickable hyperlink. To quickly send an email message to this contact, simply click the hyperlink. A new email message will open in your email program. |
Contact Type |
The contact and prospect types are used for categorizing; they are available in advanced searches and allow you to target reports and direct marketing more efficiently. · A "client" is a contact you have represented in the past, or are currently representing, or who has agreed to work with you in the not-too-distant future. · A "prospect" is a contact who may work with you in the future, but there are no definite plans. · A "personal" contact may be a friend, a doctor, etc. whom you just want to include in your database for quick access. · A "business-to-business" contact is someone who may send you referrals and you may want to include in your Business Directory. Note: A personal or business-to-business contact may also be a prospect or client - choose the type that most closely reflects how you want to use this contact in the system. Note: If the contact is an active buyer for purposes of Active Business, that is identified separately on the Properties tab. Note: If no contact type is entered for a new contact, the contact type is set to ”client” by default. Tip: You can also use List View to easily assign multiple contacts to a Contact Type. |
Contact Groups |
Contact Groups (e.g. Friend, Baseball Team, and Children's School) further categorize your contacts for searches and reports. A contact can be assigned to multiple contact groups. Tip: You
can also use contact groups to manage multiple contact lists.
For example, if you are part of a team, you might set up groups
to identify each team member's contacts (e.g. Jon's contacts,
Maria's contacts, etc.). |
Original Source of Contact |
· If the Original Source of Contact is a Referral, and the person who referred this new contact is in your contact list, click Select from Contact List to select the contact. This referral will be included in the Referral History of the source contact's profile. · If the Original Source of Contact is a Referral but the contact is not in your contact list, you can enter the name and further details in the Notes field. |
Team Member Visibility |
· Team Leaders and Administrators can control the contact’s visibility to each team member. · Select Public Contact to make the contact visible to all team members. |
Personal Details |
· Birth Date (main contact and/or spouse/partner) is needed for the contact to be included in the standard Birthday event (the year is not necessary). · The other fields can help you personalize communications with your contacts. For example, you can set up a contact-specific Keep In Touch event to acknowledge wedding or closing anniversaries (or the birthdays of family members), or use the Religion field to send greetings for a special holiday (or to exclude contacts for whom such a greeting might not be appropriate). |
To complete your contact info, you might want to:
· Record any properties the contact currently owns in the Properties tab
· Set up any contact-specific events, or assign the contact to Global Keep In Touch events you have created such as your Monthly e-Newsletter, in the Keep In Touch tab
· If the contact is to be included in your Business Directory, complete the information in the Business Directory tab
· Record additional notes or calls with the contact in the Log Calls/Notes tab